
1. Introduction
The Advantech AOM-2721 is an Open Standard Module (OSM), specifically a Computer-on-Module that adopts the OSM 1.1 form factor. It’s designed to be a compact and integrated computing platform, particularly suited for embedded applications and edge AI.
2. Prerequisites
Hardware:
- One AOM-2721 OSM development kit powered by the Qualcomm Dragonwing™ QCS6490
- Qualcomm 8-core Kryo CPU, up to 2.7GHz
- Hexagon™ Tensor Processor with 12 TOPS AI capability
- Adreno VPU 633, 4K30 Encode/ 4K60 Decode H.264/265
- Adreno GPU 643, OpenGL ES3.2/OpenCL 2.0
- Onboard 8GB LPDDR5 memory, 8533MT/s
- Onboard 128GB UFS + 128GB eMMC storage
- Featured I/O interfaces: 1 x HDMI 1920 x 1080 @60Hz, 1 x DP 1920x1080 @60Hz, 2 x 4-Lan MIPI-CSI, 1 x USB 3.2 Gen1, 2 x PCIe Gen3
x1, 1 x PCIe Gen3 x2, and 2 x GbE - One x86 development machine with 16GB of RAM and 350GB of storage
- One Full-HD HDMI monitor and one HDMI cable
- One USB mouse and keyboard set
Software:
- Installing the Yocto OS (via a Ubuntu host machine)
- Setting up AI runtime on the AOM-2721
3. Edge Impulse Design
Step 1: Navigating to the “Experiments” page to prepare for creating a new impulse flow by clicking “Create a new impulse.”

Step 2: In the impulse configuration page, setting the input image size (416x416) and resize mode as the basis for subsequent image processing and learning.

Step 3: Adding a “Processing block” in the impulse, selecting the Image module to preprocess and normalize images.

Step 4: The impulse configuration is updated with input image parameters on the left and the Image processing module in the middle.

Step 5: Adding a “Learning block,” with options such as Object Detection, FOMO anomaly detection, or the YOLOv5 model.

Step 6: The impulse setup completed, including the image input module and the YOLOv5 learning block, with output features for crooked, over-soldering, and tombstone classes.

Step 7: Successfully saving the impulse configuration, with input and learning modules established, ready for subsequent training.

4. Feature Generation
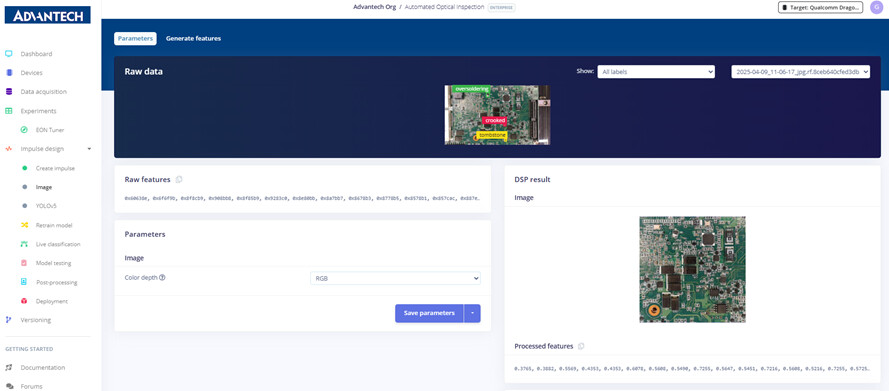
Step 8: In the Image module settings page, viewing the raw image, RGB color depth, and processed feature results.
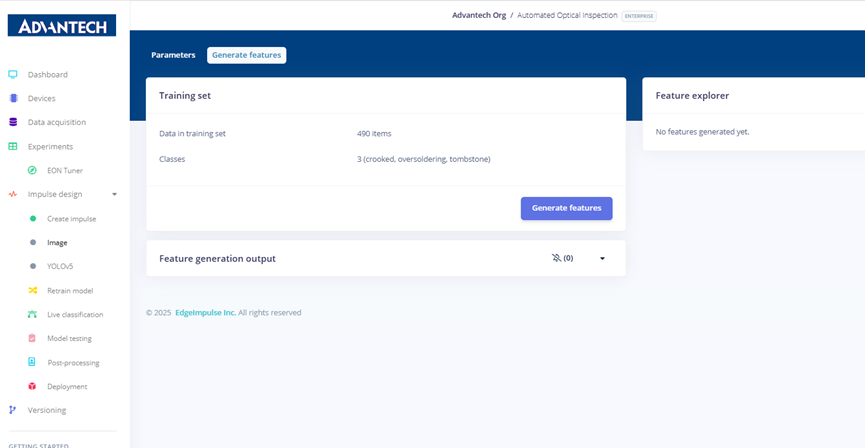
Step 9: Preparing to generate features, with the system showing 490 training samples divided into crooked, oversoldering, and tombstone categories.
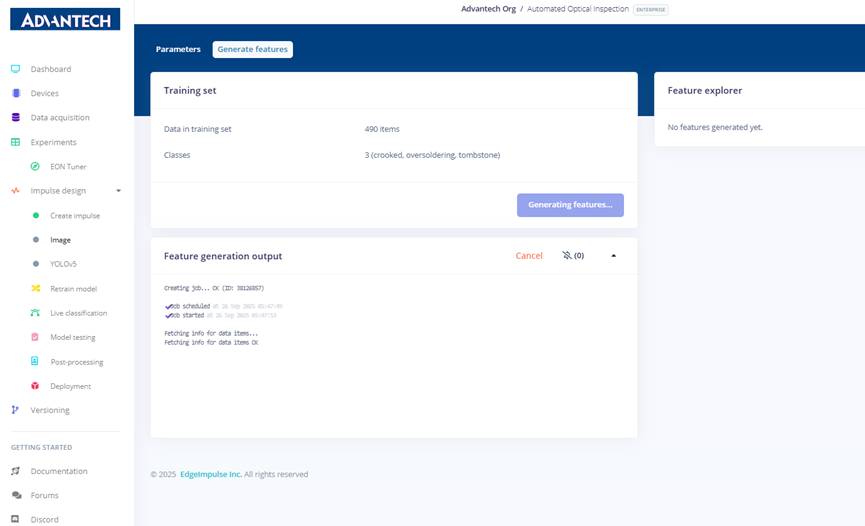
Step 10: During feature generation, the system processes the dataset and displays job scheduling and progress.
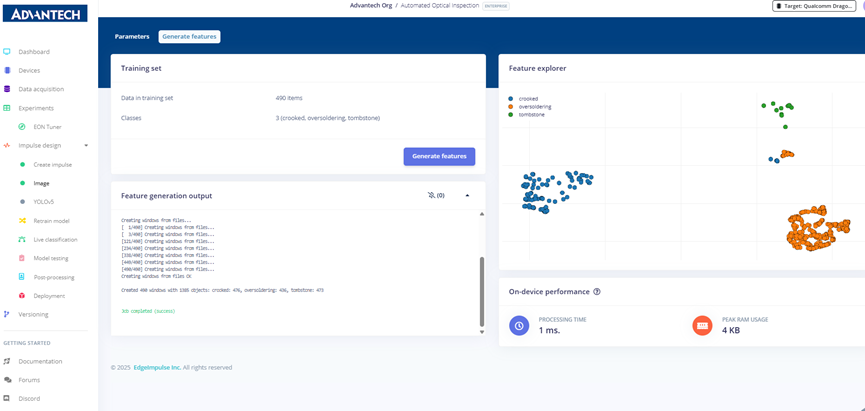
Step 11: Feature generation completed, showing the number of samples per category, along with on-device performance information such as processing time and memory usage.

Step 12: Feature visualization result, displaying crooked, over soldering, and tombstone samples as colored scatter plots.
5. Model Training (YOLOv5)
Step 13: YOLOv5 settings page, where users can configure the training processor (CPU/GPU), number of training cycles, model size, and batch size.

Step 14: Configuring YOLOv5 training parameters, setting the number of training cycles to 200 and selecting the Small model (7.2M parameters).

Step 15: Adjusting the batch size to 16 to match training resources and dataset size.

Step 16: Starting YOLOv5 model training, with the system displaying training progress and real-time logs.

Step 17: Training results page showing a Precision score of 99.2%, along with detailed performance metrics such as mAP and Recall.

6. Retraining and Testing
Step 18: On the “Retrain model” page, selecting the existing image module and YOLOv5 learning block to prepare for model retraining.

Step 19: During model retraining, the system shows ongoing feature processing and YOLOv5 training.

Step 20: After retraining, the system indicates that all modules executed successfully and model testing is complete.

Step 21: On the “Live classification” page, selecting the device and camera source, then clicking “Start sampling” to begin real-time image classification.

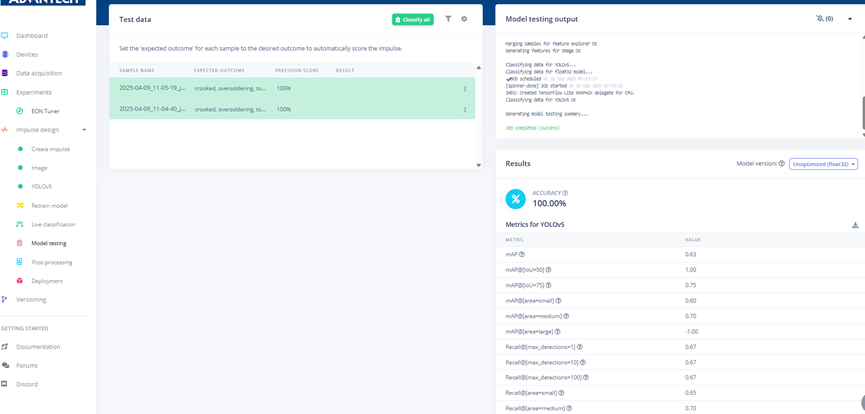
Step 22: Model testing results show a 100% accuracy rate for test images, with detailed metrics such as Precision and Recall.
7. Deployment
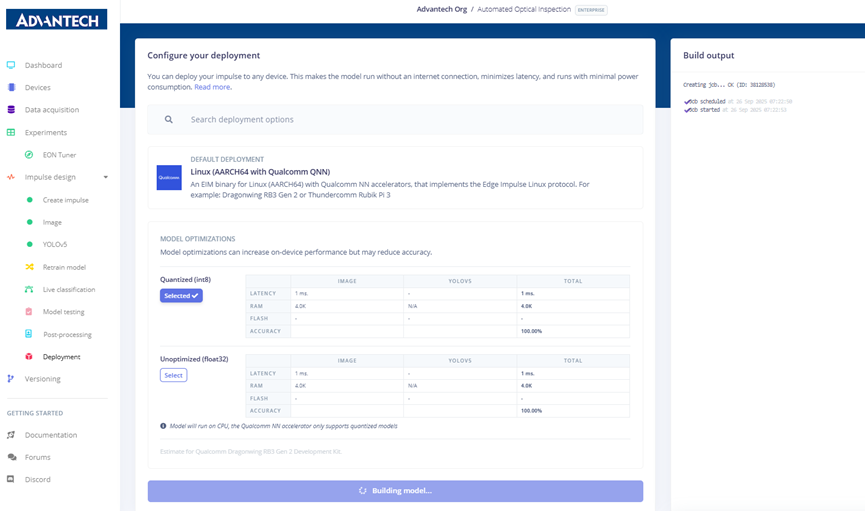
Step 23: On the “Deployment” page, selecting the deployment target as Linux (AARCH64 with Qualcomm QNN) and configuring model optimization options.

Step 24: Configuring model deployment by selecting quantized (int8) or float32 modes, with the option to run model testing.

Step 25: During the model build and deployment process, the system shows the generation of deployment files.
Step 26: The model build is completed successfully, and the downloadable .eim deployment file is available.

Step 27: Running the compiled Edge Impulse model file (.eim) on the QCS6490 development board to start the inference process.

Step 28: Copying the compiled .eim model file from the mounted USB disk to the QCS6490 development board file system.

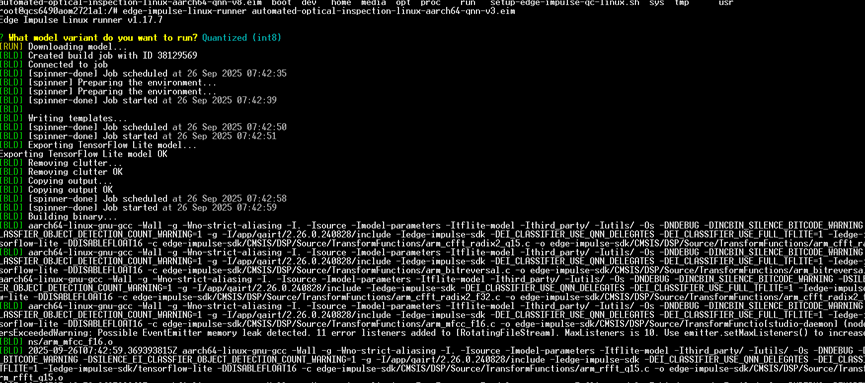
Step 29: Running the .eim model file on the development board using the
edge-impulse-linux-runner command.Step 30: The system prompts for the model variant, allowing the user to select either Unoptimized (float32) or Quantized (int8).

Step 31: After selecting the quantized (int8) model, the system downloads and deploys the model.
Step 32: The model build and deployment complete, showing “Building binary OK” and backing up deployment files.

Step 33: The model build and deployment complete, showing “Building binary OK” and backing up deployment files.
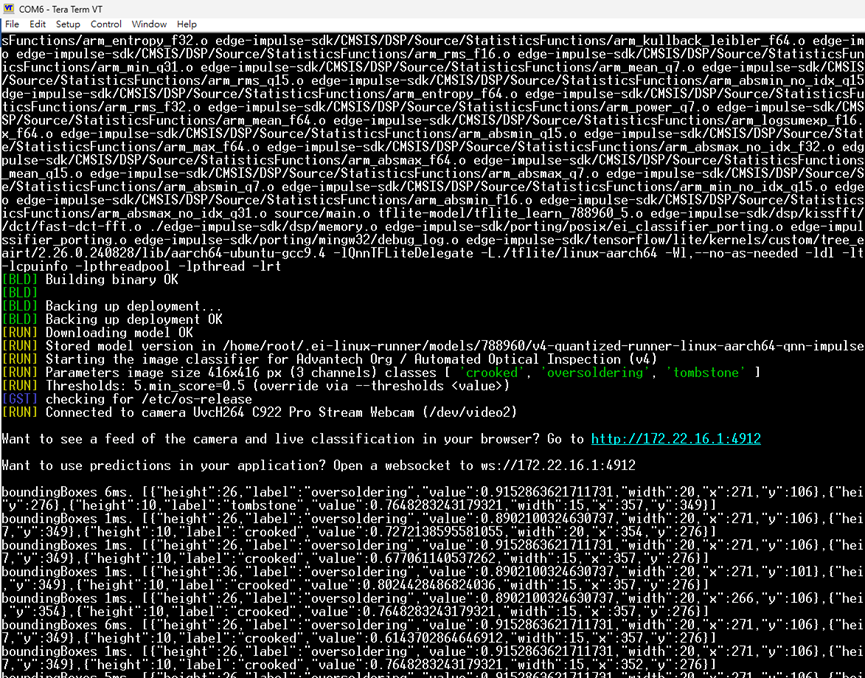
Step 34: The model build and deployment complete, showing “Building binary OK” and backing up deployment files.


8. EON Tuner Optimization
Step 35: Entering the EON Tuner page to configure hyperparameter search for model optimization.

Step 36: Configuring a new experiment in EON Tuner, named Run #1, with the objective set to minimize validation loss.

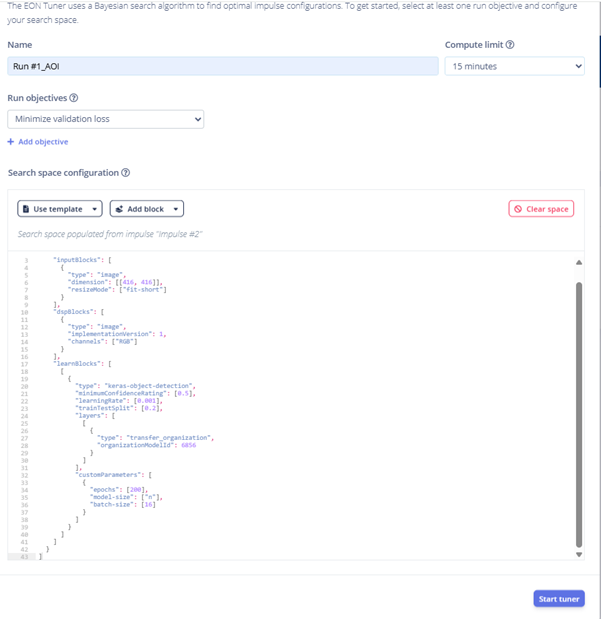
Step 37: In the EON Tuner setup, naming the experiment Run #1_AOI and selecting the use case as Object detection (bounding boxes).

Step 38: The EON Tuner experiment starts running, with the system automatically searching for optimal configurations.

Step 39: EON Tuner displays the search progress, including test results from different hyperparameter combinations.

Step 40: EON Tuner results page showing performance comparisons across various model configurations.
Step 41: EON Tuner selects the best model configuration, highlighting the recommended optimized settings.

Step 42: After optimization, the system prompts to retrain and deploy the new model configuration.

Step 43: The AOI model deployment is finalized, with the Edge Impulse platform showing that the optimized model is successfully built and ready for inference. Finally, you can add this optimized model to your project, ensuring that you obtain the best data for training.
